Access iPhone Backup, recover files from iPhone backup

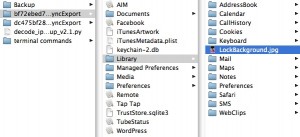
output from python fileIt was bound to happen sooner or later. I took a photo with my phone and used the image as the wallpaper for when the phone is locked. However, I completely overlooked this when I deleted the original image from the camera roll. This meant I had an image in place but no way of accessing it, and I quite liked the image!

It turns out that when you connect your iPhone to your Mac and iTunes starts, it runs a backup and places some files in your ‘~Library/Applications Support/MobileSync/Backup folder. The problem is that they are SQLLite files and not easily readable in any simple way. This is where I turn to the Apple community, particularly the discussions, and ask for help. Here is the post I made.

I was so pleased with the response – almost immediate and ultimately one of the most helpful. It appears there is a Python script able to open those files and restore the folder structure from the innards of your phone. The thread answers the questions most folk will have, but I thought I’d post here too.

What you need to do is copy the backup folder and all it’s contents to an easily accessible place – I chose a new folder on my desktop. Copy the Python script into the same folder. You then need to change the permissions on that script to ensure that it is executable. You should do this through the terminal, which means you’ll probably need to use ‘sudo’ and ‘chown’ to set the values correctly. Once you have done this you can run the script. You do this by typing ‘sudo’, then the complete path to the script, a forward slash, then the complete path to the folder (you can simply drag the items into the terminal window to do this and the paths will be filled in automatically for you). Finish with a forward slash and then ‘*.mdbackup’.

What this will do is reconstruct the entire iPhone folder structure inside the place you have got the python script and backup folder. Once done you can then set the permissions for the resulting foder and copy to all items inside… you can then access and manipulate the files.

This was, in fact, ludicrously easy – I had help from a former colleague who is something of a star with this stuff, but if you know a few basic commands in the terminal you should be OK.

I’ve also uploaded the Python script for you all to download from here in case it goes offline elsewhere. The original is HERE. The one I used (and changed ownership on) is HERE.

Combining PDF files using Mac OSX

Every now and then I get the urge to start Adobe Acrobat when I’m using my Mac. I don’t like doing this, because Acrobat is a bit of a beast and I’ve had more failures with it than successes. It’s probably of my own doing, but I don’t seem to get on very well with the application.

Avoiding Acrobat is one thing, but there is a feature of it that comes in very handy, and that’s combining different PDF documents into one single document. Up until recently I have always had t use Acrobat, but today I bothered to look beyond. Today, I used ‘Automator’ that little app that sits in the Applications folder and seldom gets used. Read more

Firefox Search Bar tricks, changing the default Firefox search from US to UK

I’m a bit of a Firefox fan, despite the fact the browser seems to render colours with less saturation. One of the very nice things I like is the search bar at the top right, which contains links through to some of the most frequently used search engines. You can customise the list easily enough, but you can’t customise the default search locations… or can you?

Normally, I like to search UK domains first, particularly when looking for a price or simply heading towards eBay or Amazon. I don’t mind the US versions, but I don’t head there by default. Until today I have been stuck with using ‘UK’ in every search term. Today, however, I decided to investigate it further.

Using a Mac, go to the Firefox application, control+click on it and select ‘Show Package Contents’ . Next, navigate to ‘MacOS/searchplugins’. In there you’ll find some simple XML files which are readily editable. I opened the Google, Amazon and eBay files and changed the settings manually from ‘.com’ to ‘.co.uk’. You can also change the title so that in the search bar it tells you where you are looking, too! A quick restart of Firefox and the new settings are in place.

google_search

Each time I search Google now, I default to the ‘.co.uk’ version and get the option of looking at the entire web, or simply pages from the UK. I’m happy with that! Similarly, Amazon now defaults to the UK site, as does eBay. Oh Joy 🙂

Of course, I fully expect an update will wipe out those changes, so a quick save of the files for later use is also necessary…

Dark Mood V2 WordPress theme, editing wordpress files, encoding PHP

It may come as no surprise to some to find that freely available themes have got advertising embedded in them by default. It came as a surprise to me, mind you! I downloaded and installed the Dark Mood V2 wordpress theme by Ed Canape and found that in the footer file there was a PHP function that positioned some adverts. Not rocket science, but I wasn’t happy with the kind of ads that appeared. One was a pay per click affiliate program, one about Asian entertainment (ooer…) and one about Philipine paradises. However, what really ticked me off was the fact that the function had been encoded so as to make it hard to unpick it and remove said adverts.

Of all the encoding methods available to PHP programmers, possibly the best is from Zend. One of the most pointless is gencoder (although free). Luckily, it was gencoder that had been used on this occasion. The file looks like this:

encoded php

Now, as you can see there is no easy way to get into the code and remove the advertising links. However, there are two possibilities.

Firstly, you can create a CSS rule in your stylesheet which sets the footer ‘a’ display to be none:

footer a {
display:none;
}

All this does is remove any clickable links in the footer, but leaves the remaining text. This is at best a workaround, but can get you out of a fix if you are in a hurry.

The second thing to do is decode the file! Again, there are two ways to achieve this, but probably the simplest is to edit the ‘eval’ statement to read ‘print_r’ instead. If you then run the code in your browser you’ll see that it makes a bit of a mess visually, but you can still right click and ‘view source’. What you are looking for is at the bottom of the page:

if((isset($v) AND $v==0) OR (isset($t) AND $t==false)){die('This script is protected by <a style"color:cyan\" href="http://www.gencoder.sf.net\"><b><font color"#330099\">G-Encoder</font></b></a>');}echo "<div id"footer\">n";
echo " Powered by n";
echo " <a href="http://wordpress.org\">WordPress</a>n";
echo " and Design by Ivy's <a href="http://www.rubberstampguides.com/\">Rubber Stamp</a> n";
echo " Guiden";
echo " <p><a href="http://www.kirrhi.com/\">Pay Per Click Affiliate Program</a> | <a href="http://yeinjee.com/asianpop/tag/asian-entertainment/\">Asia Entertainment</a> | <a href="http://www.paradise-philippines.biz/\">Paradise Philippines</a></div>n";
echo "</div>n";
echo "n";
echo " <?php wp_footer(); ?>n";
echo "n";
echo "</body>n";
echo "</html>n";

Now you can see the code more clearly, and you can easily see what needs to happen. The last four lines are all you need… in fact, one of those can be deleted! What you really need is the call to the wordpress footer routines and to close the body tag and close the html. This is all that is necessary to complete the footer file in wordpress. Armed with this knowledge, go back and change the ‘print_r’ statement if you like, but better yet, just delete all of that guff. In it’s place simply add the following few lines of code. You can leave out the ‘div’ tags if they are not needed:

<div class="footer">
<?php wp_footer(); ?>
</div>
</body>
</html>

and that’s it. Save the file and you have got yourself an advert free footer space on your wordpress blog.

Thanks (as ever) to Alex Blanc for his timely and ultimately very simple solution to the problem, and no thanks whatsoever to the person who decided to a) put adverts in the footer, and b) encode them at all. I believe each person needs to have the right to choose whether to display adverts, and in this case I chose most strongly not to!

Using ‘Grep’ with BBEdit

I learnt an interesting thing last week, the day after I had been working on some DVD Studio Pro subtitles. I had used Excel and BBedit (from barebones software) to do some find and replace operations in order to re-structure the subtitle file that was sent to a friend of mine. As it turned out my familiarity with Excel was good enough to get the file into the correct format, but there were still some bits and pieces that needed tidying up manually. With several hundred lines of sub title to work through that was always going to be a challenge, so I stopped at that point. The subtitle would import into DVD Studio Pro fine, and so I felt reasonably OK that the job was close enough to allow my friend to finish it off without too much trouble.

I mentioned the struggle I had with this to my colleague Alex Blanc, and he suggested I used ‘Grep’. Now, I have seen the checkbox in BBEdit’s ‘find and replace’ dialogue, and I had a vague idea that it worked with regular expressions, but I had not taken the time to read up on it or try it out. I was, in fact, completely in the dark.

Which is a reasonable place to be, for a lot of the time, when it comes to really geeky things!

However, Alex went to work on instructing me about how to use Grep. It turns out to be a really flexible language which has a small instruction set that you can adapt and use to do very intricate find and replace routines. For example, in the entry about DVD Studio Pro subtitles (a couple earlier than this one) you’ll see that the file format was all wrong. There was a full stop towards the end of the timecode that should have been a colon, but I couldn’t simply use find and replace to change all full stops to colons because there were also full stops within the subtitles themselves. However, using Grep you can write a command that looks for specific instances of full stops nestling between digits, and you can be pretty explicit about the string of digits before and after the full stops that you want to replace.

When complete, the search field in BBedit looks a bit odd, using strings like this:

^\s\d{1,3}:\s(\d{2}:\d{2}:\d{2})\.(\d{2})\s(\d{2}:\d{2}:\d{2})\.(\d{2})\s*\r\s*(.+)$

But when you understand what it is saying you can really get a lot out of it. Each character in that string represents a different command. For example ‘^\s’ is looking for a space character, ‘\d’ looks for a digit and the curly braces give the search criteria for the digits. Reading along that line then the function is going to look for a series of digits followed by a colon, then followed by a space and then another distinct series of digits (notice how the distinct set are held in parentheses) ending with a full stop and then another two digits…. and so it goes on.

What that string is doing is describing the general format of the incorrect timecode from the subtitle file and setting up sections that we can rely on when replacing the content.

Now, Alex is particularly gifted with this stuff, in my opinion, and can see the way through a lot of the code like he was part of the Matrix. I, on the other hand, tend to need time to go through it all slowly after being shown it so that I can then begin to understand it in my own time. I think it’s an age thing…

Anyway, Alex had written the Grep string in less than ten minutes, having tried a couple of versions first to get it working. The end result was that in about ten minutes, using only BBEdit, Alex had re-structured the subtitle file perfectly – mine still had issues that needed sorting out manually.

I’m not sure what message this gives me, really. I am now reading through the Grep manual that comes with BBEdit and it makes a lot of sense. It can do ‘If:Then’ type structures and you can nest commands quite deep. This gives it a lot of power and more flexibility than you can get by using Excel alone. Those of you reading this who are quietly chuckling away because you have been using Grep in Linux or Unix installations should share a bit of that knowledge… it really is a very useful tool, if slightly arcane to get to grips with!